Before You Start
Read this first — it'll save you headaches later.
Moving a project from Lovable or Replit is a bit like moving house. It's not instant, and there's a checklist to follow — but once you're done, your project is yours, living on infrastructure you control.
A simple project (just a website, no database): about 1–2 hours. A project with a database and logins: plan for a half day. Take it at your own pace — nothing here is urgent.
Take a screenshot of your working project. Note down every feature that works today. This is your "before" picture so you can confirm everything works the same after moving.
Things you'll need
- A computer running Windows or Mac
- A free GitHub account (we'll use this to store your code safely)
- About 1–4 hours of uninterrupted time
- Access to your Lovable or Replit project (logged in)
- A notepad (or text file) to save passwords and settings as we go
Install Git & Get Your Code
Git is a free tool that saves every version of your code. Think of it as undo/redo on steroids.
Git is like a filing system for your code. Every change you make gets saved in history, so you can always go back. Developers worldwide use it. It's free, and you'll need it to move your project.
Install Git on your computer
Only need to do this once, everGo to git-scm.com/download/win — the download will start automatically.
Open the downloaded file (it looks like Git-2.x.x-64-bit.exe). Click Yes if Windows asks for permission.
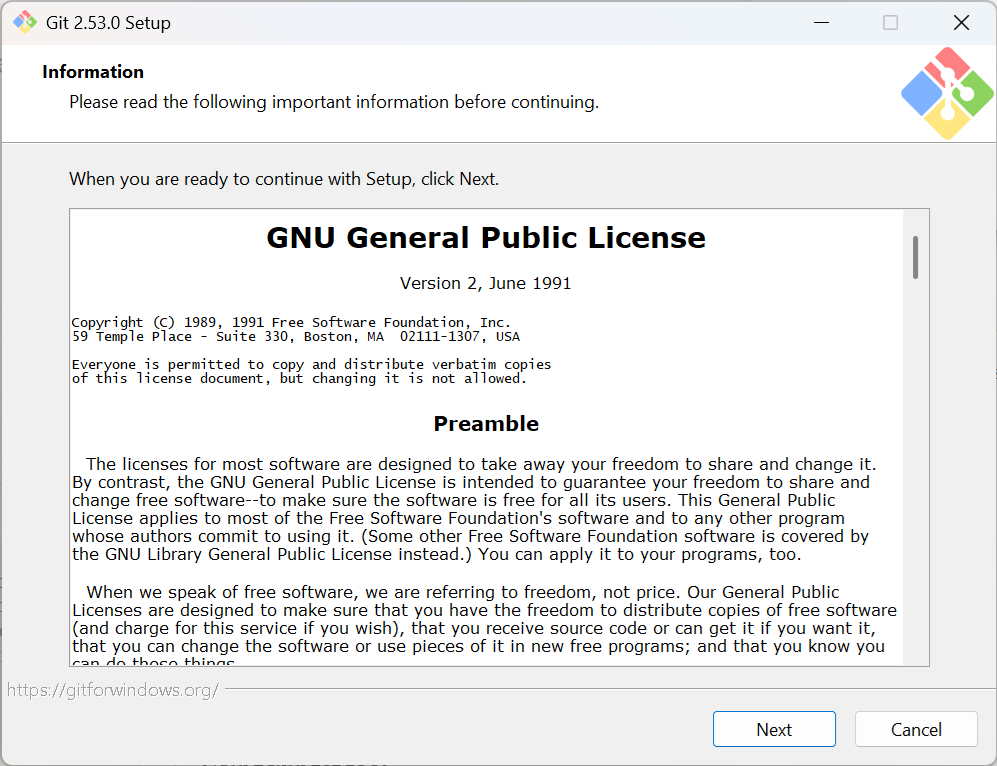
Click Next through all the screens — the default options are fine. Click Install at the end, then Finish.
Check it worked: Press the Windows key, type cmd, press Enter. A black window opens. Type:
git --version
You should see something like git version 2.43.0. ✅
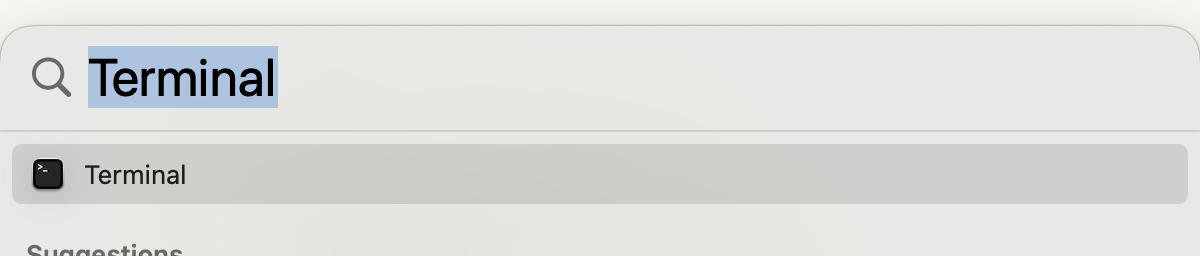
Open Terminal: press ⌘ Command + Space, type Terminal, press Enter.
Type this and press Enter:
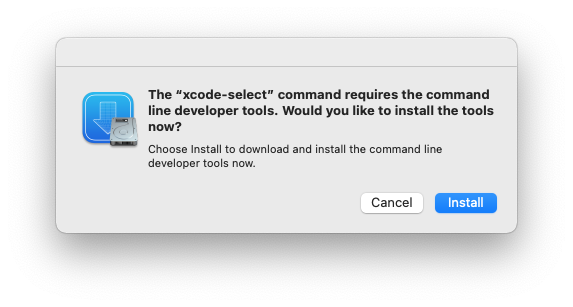
xcode-select --install
A window will pop up asking to install Developer Tools. Click Install. This includes Git. Wait for it to finish (5–15 minutes).
Check it worked: In the same Terminal window, type:
git --version
You should see something like git version 2.43.0. ✅
Download your code from Lovable or Replit
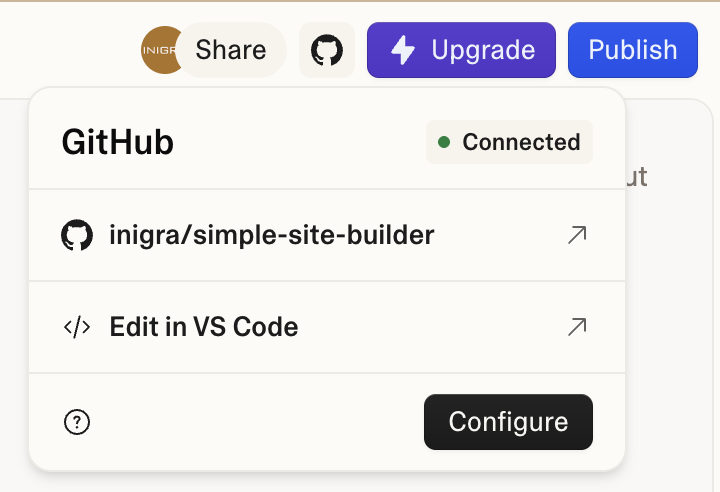
Choose the tab that matches your platformOpen your project in Lovable and click the GitHub icon or button in the top bar (it looks like a cat/octocat logo).

Click "Connect to GitHub" or "Push to GitHub". If asked, log in to GitHub and allow Lovable access.
Lovable will create a new repository on your GitHub account. Write down the URL — it will look like:https://github.com/your-name/your-project
Alternatively, if you see a Download ZIP option — use that. Save the ZIP file somewhere easy to find, like your Desktop.
Open your Replit project. Look for "Git" in the Tools menu on the right.
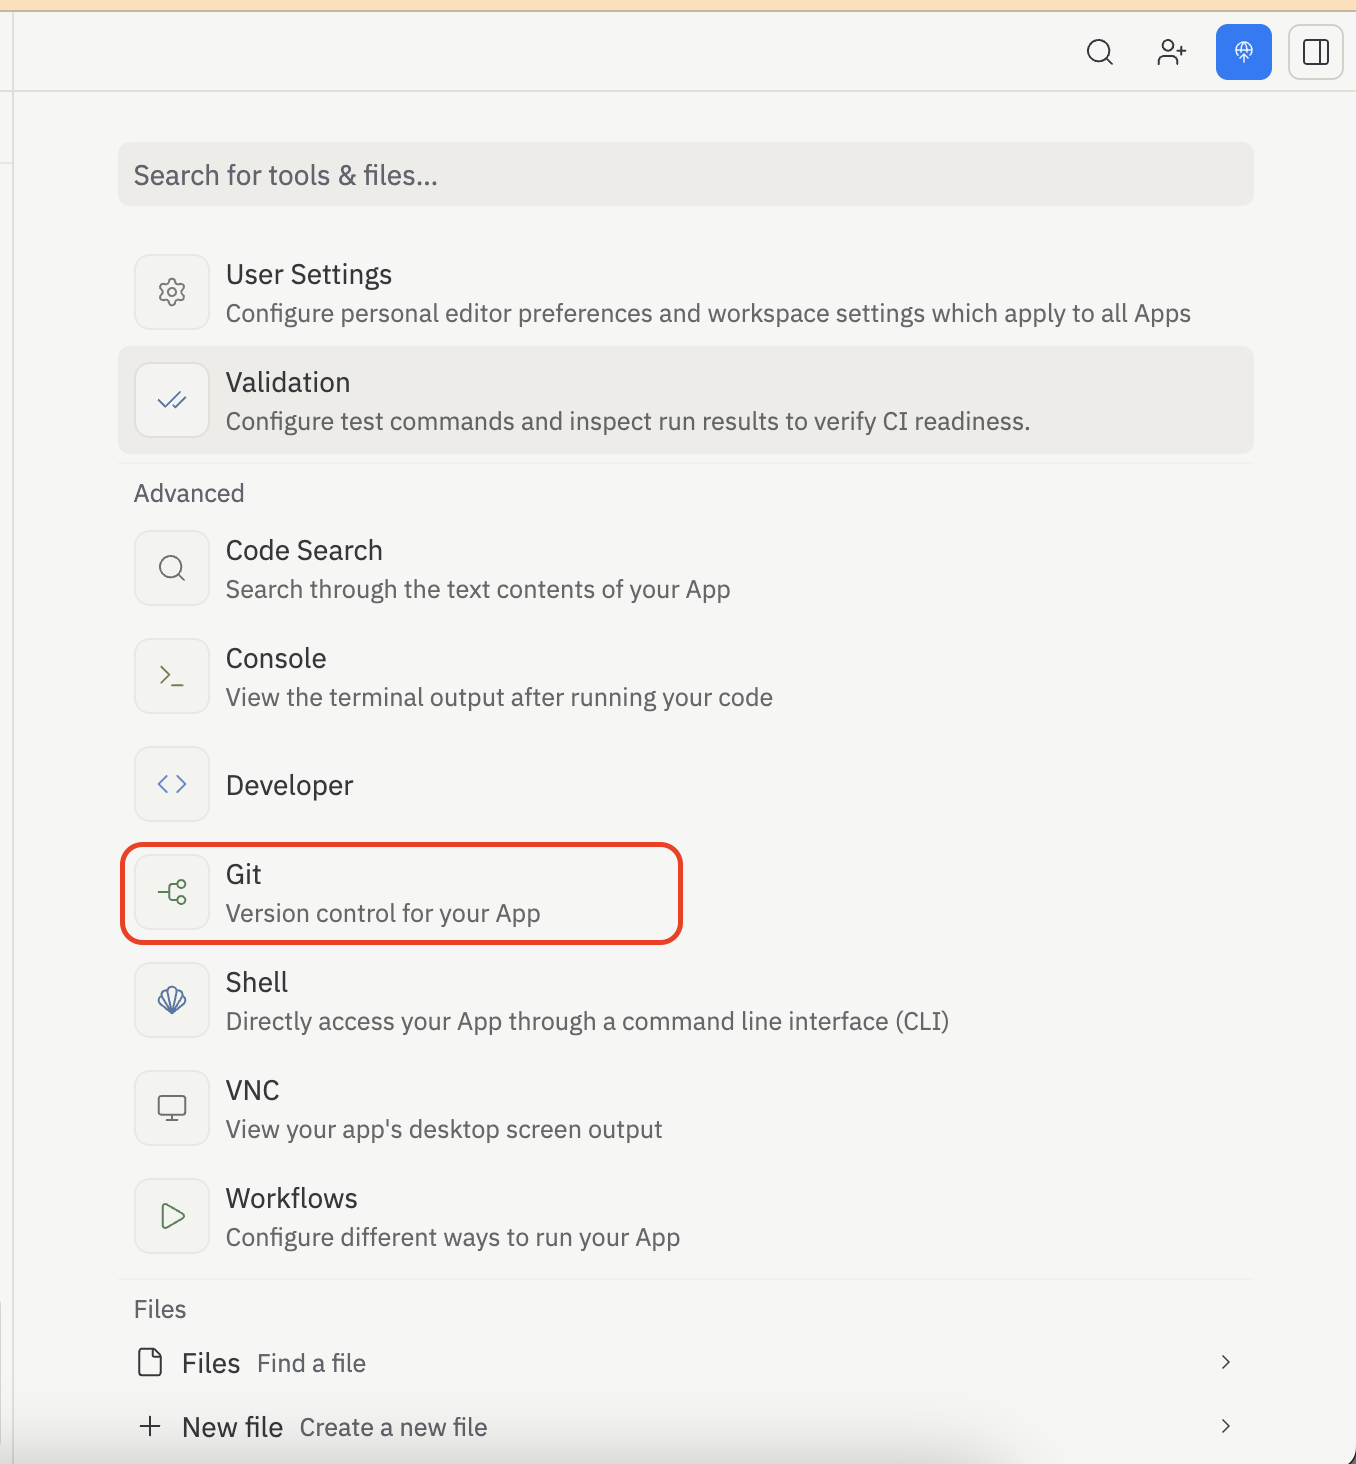
Click "Connect to GitHub" and follow the steps to push your code to a new GitHub repository. Write down the URL.
Open a command window in your project folder
This is how you "talk" to your computerIt's a text-based way to give your computer instructions. It sounds scary but we'll only type a few simple things. Every instruction is written out in full for you.
Open File Explorer and navigate to your project folder.
Click the address bar at the top (where it shows the folder path), type cmd and press Enter.
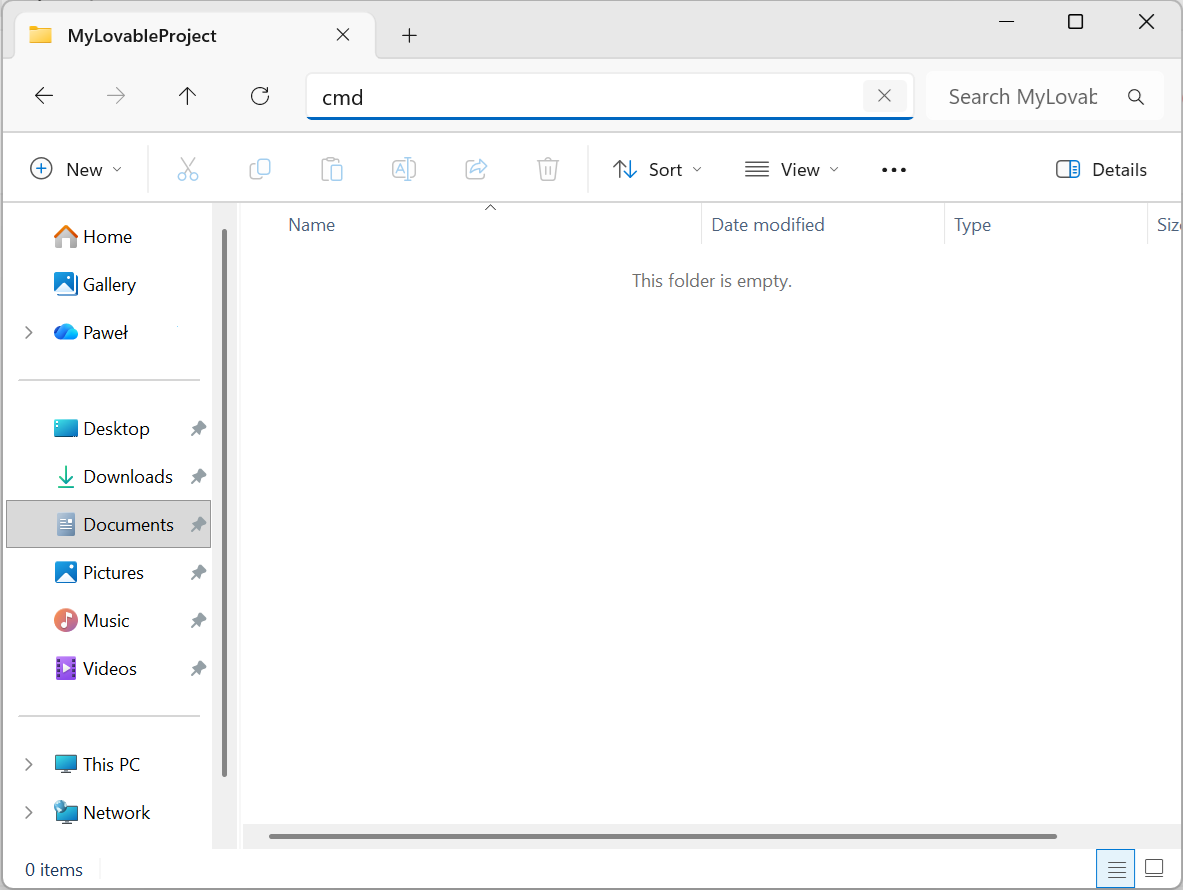
A black window opens already inside your project folder. ✅
Open Finder and find your project folder.
Right-click (or Control-click) on the project folder → select "New Terminal at Folder".
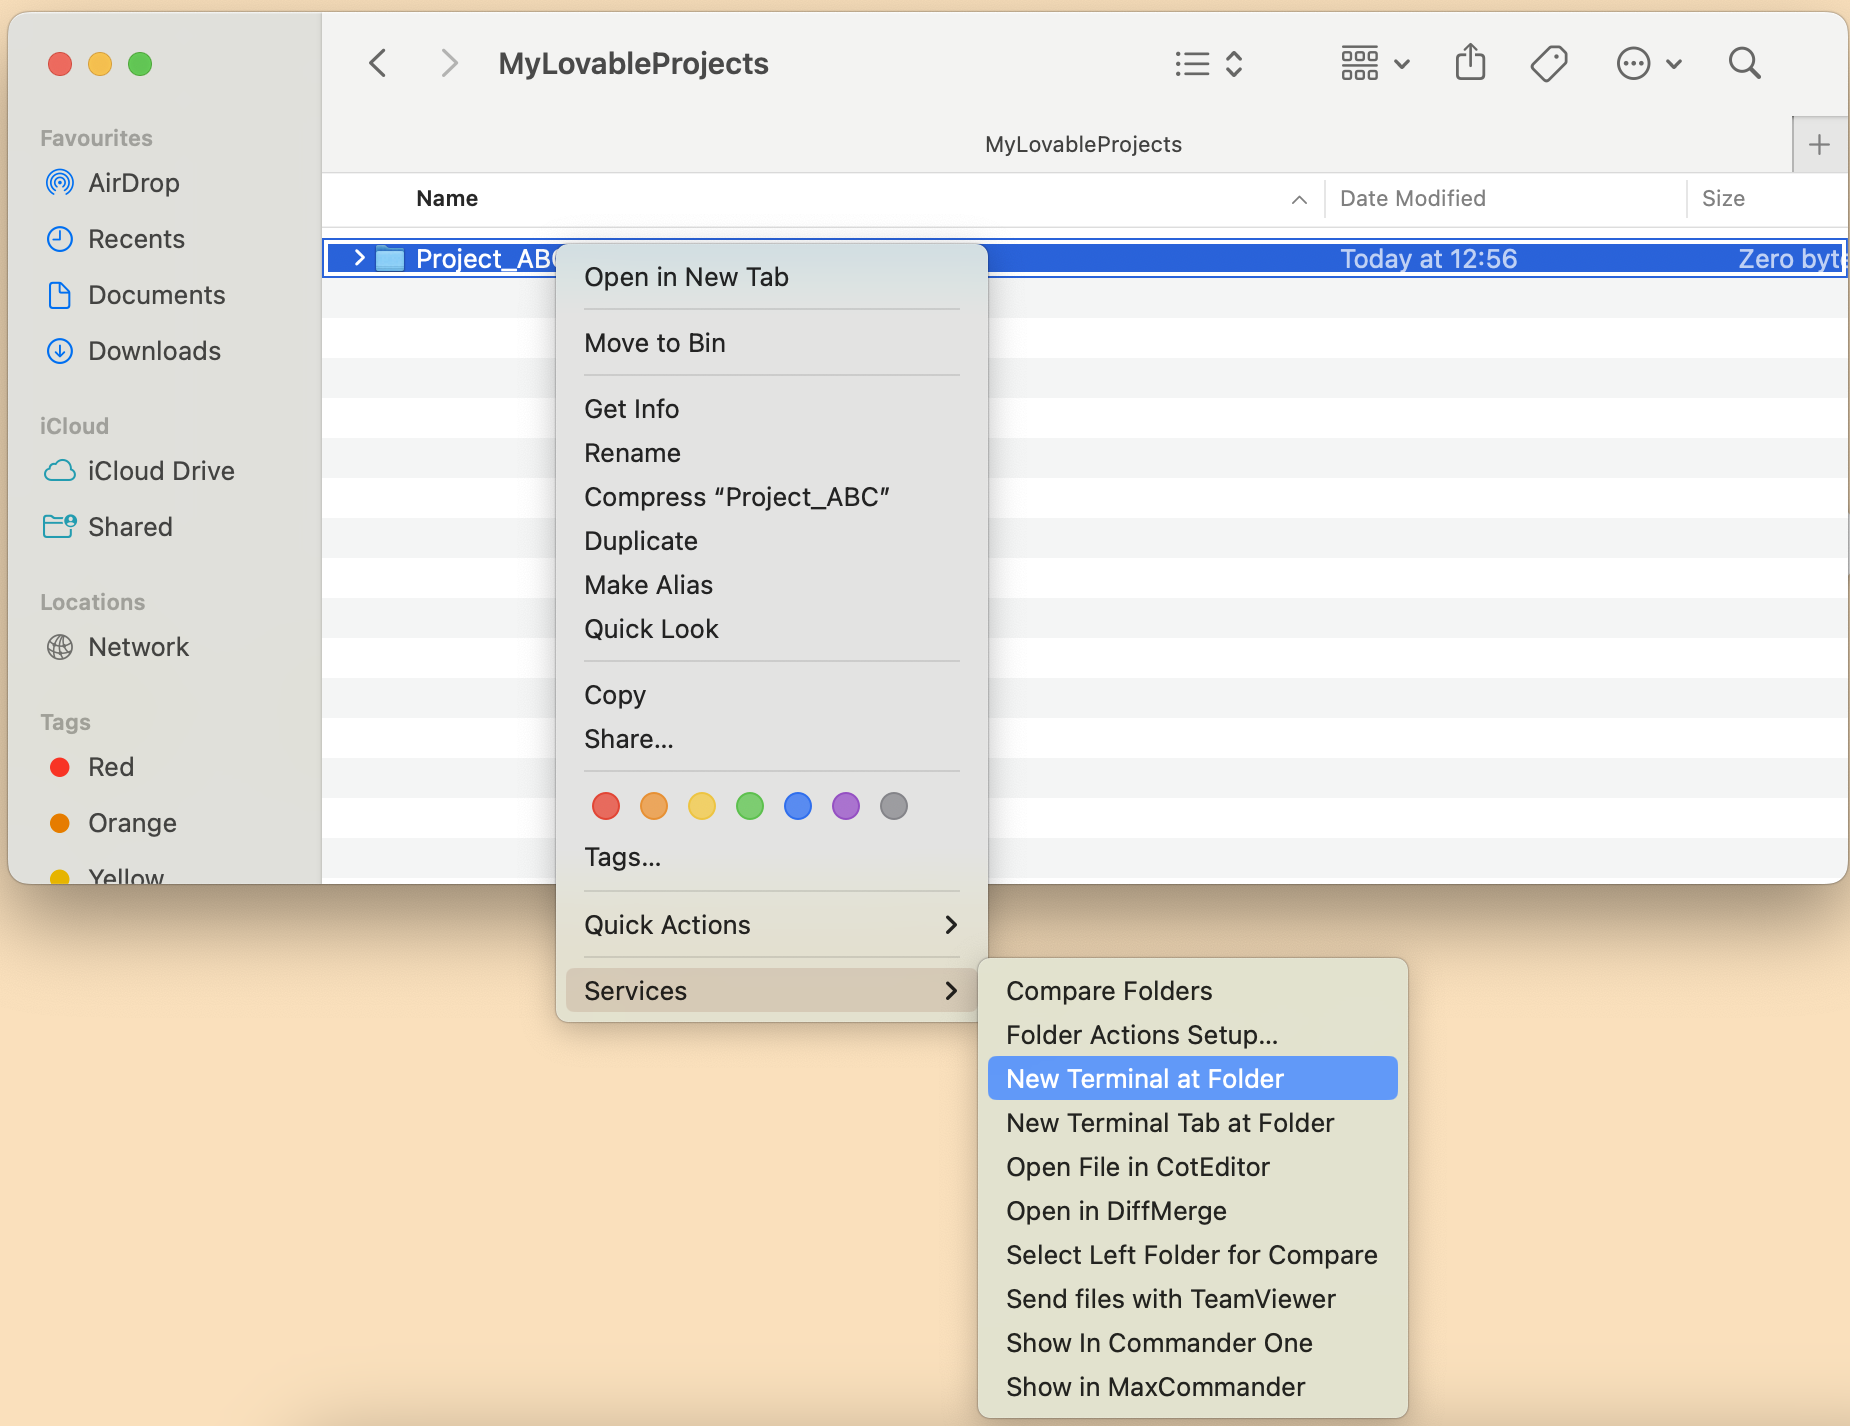
If you don't see this option: open System Settings → Keyboard → Keyboard Shortcuts → Services → enable "New Terminal at Folder".
Now in your command window, type these commands one at a time, pressing Enter after each:
# Tell Git who you are (use your GitHub name and email)
git config --global user.name "Your Name"
git config --global user.email "you@example.com"

# If your code isn't from GitHub yet (downloaded ZIP), run these:
git init
git add .
git commit -m "My project, first save"
Save Your Secret Settings
Every app has settings and passwords stored behind the scenes. We need to copy these before moving.
Think of them as the keys to your app's locked doors — passwords for your database, secret codes for payment systems, and connection details. Without them, your moved app won't work. They're called "environment variables" because they live in your server environment, not in the code itself.
In your Lovable project, click on Cloud (cloud icon ) on the top.
Look for a section called "Secrets".
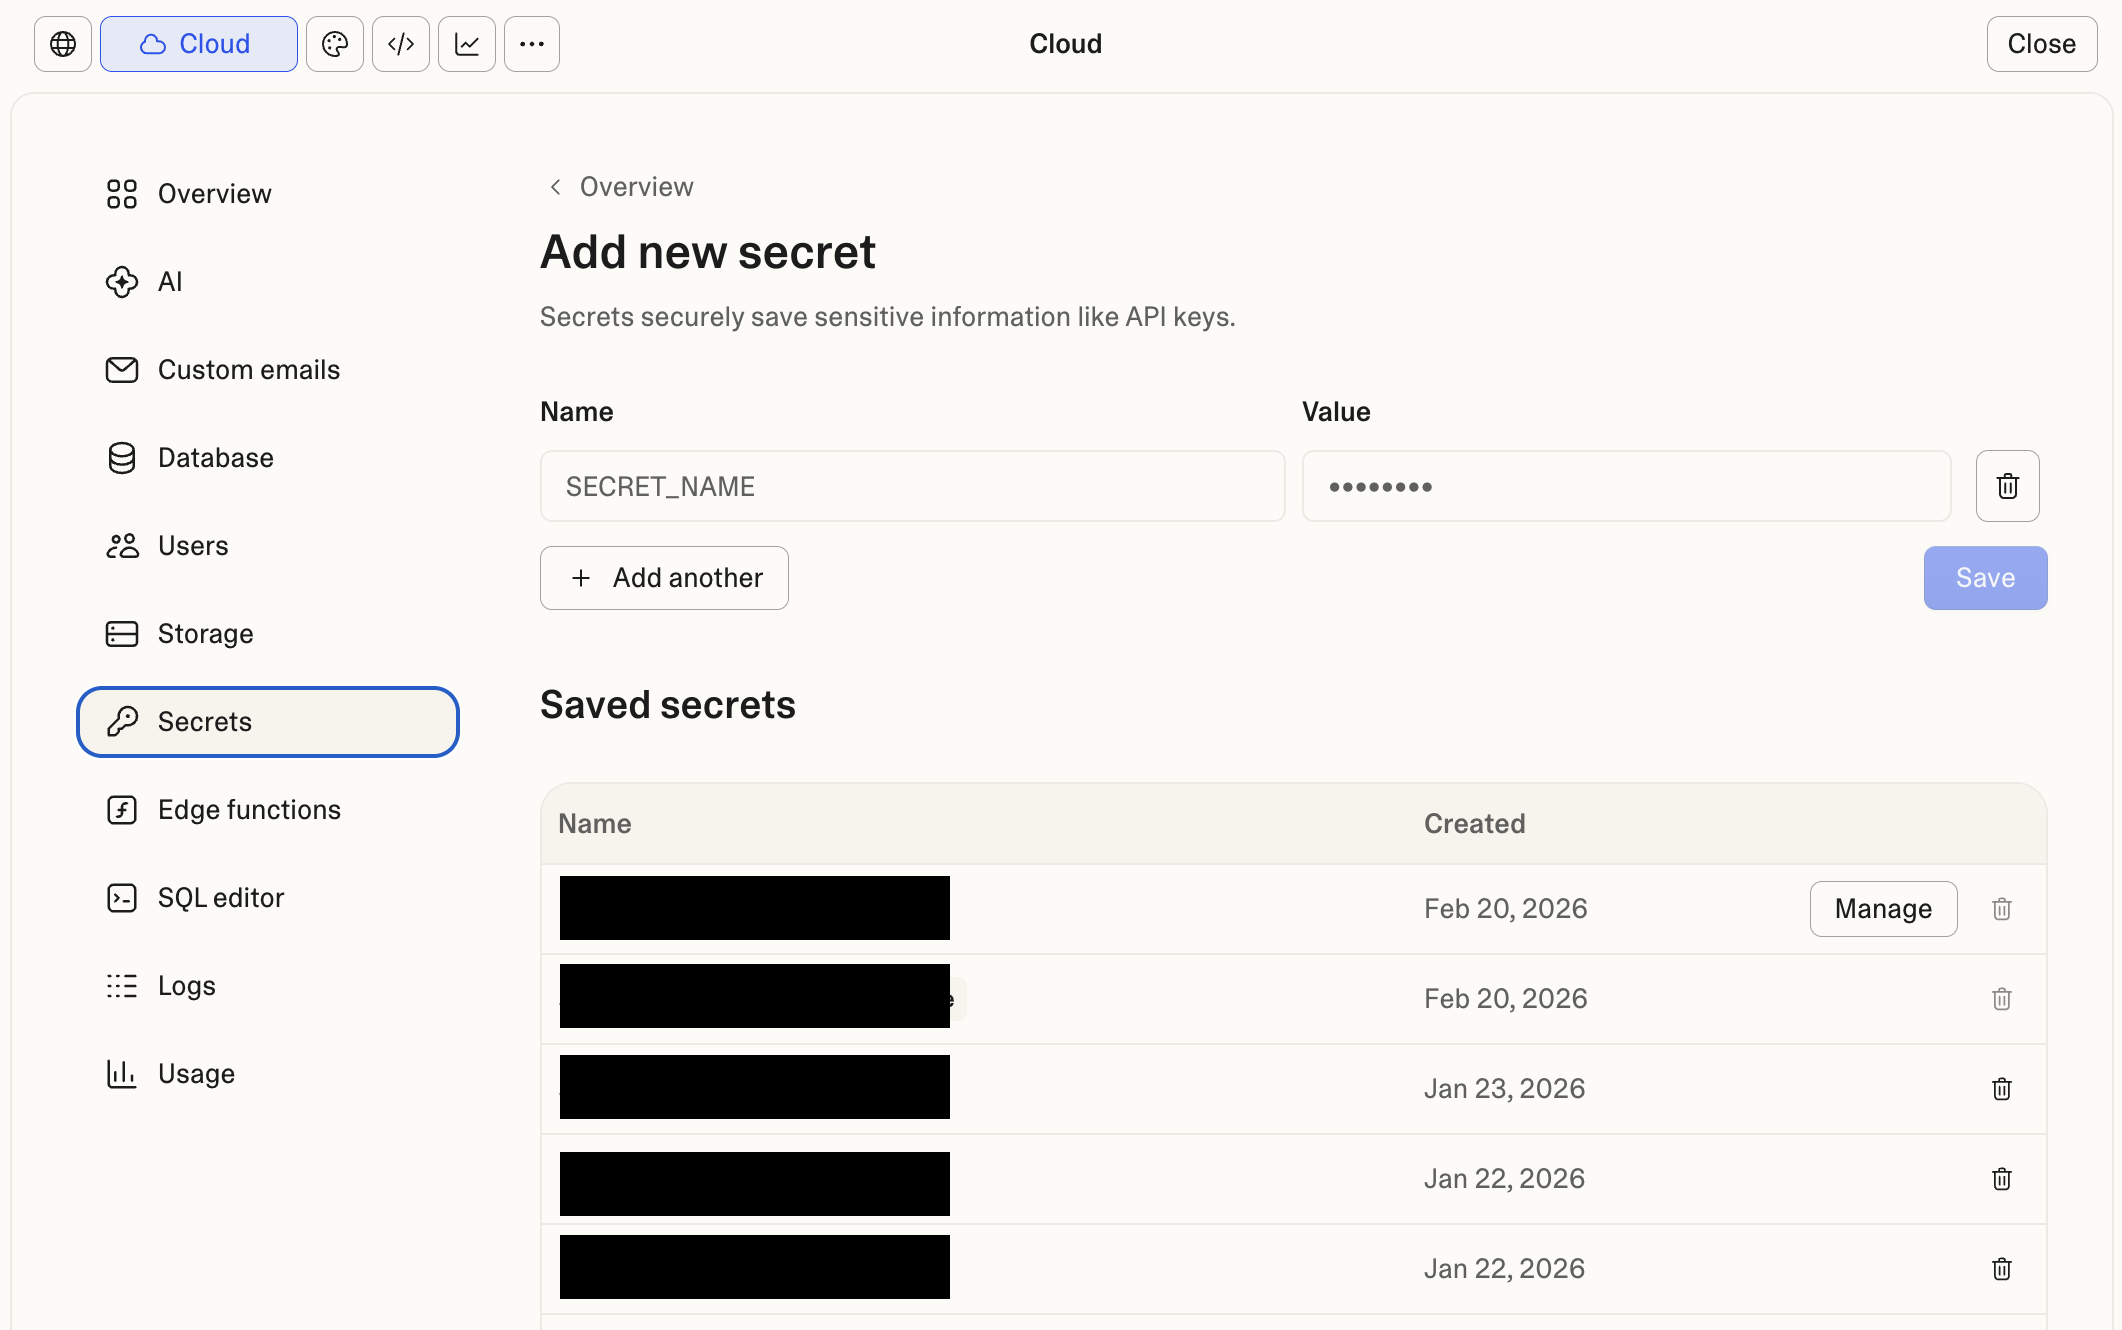
Write down every single variable — the name on the left and the value on the right. Keep this somewhere safe (a private note, password manager, or local text file never uploaded anywhere). You'll need these exact values when you set up your new home.
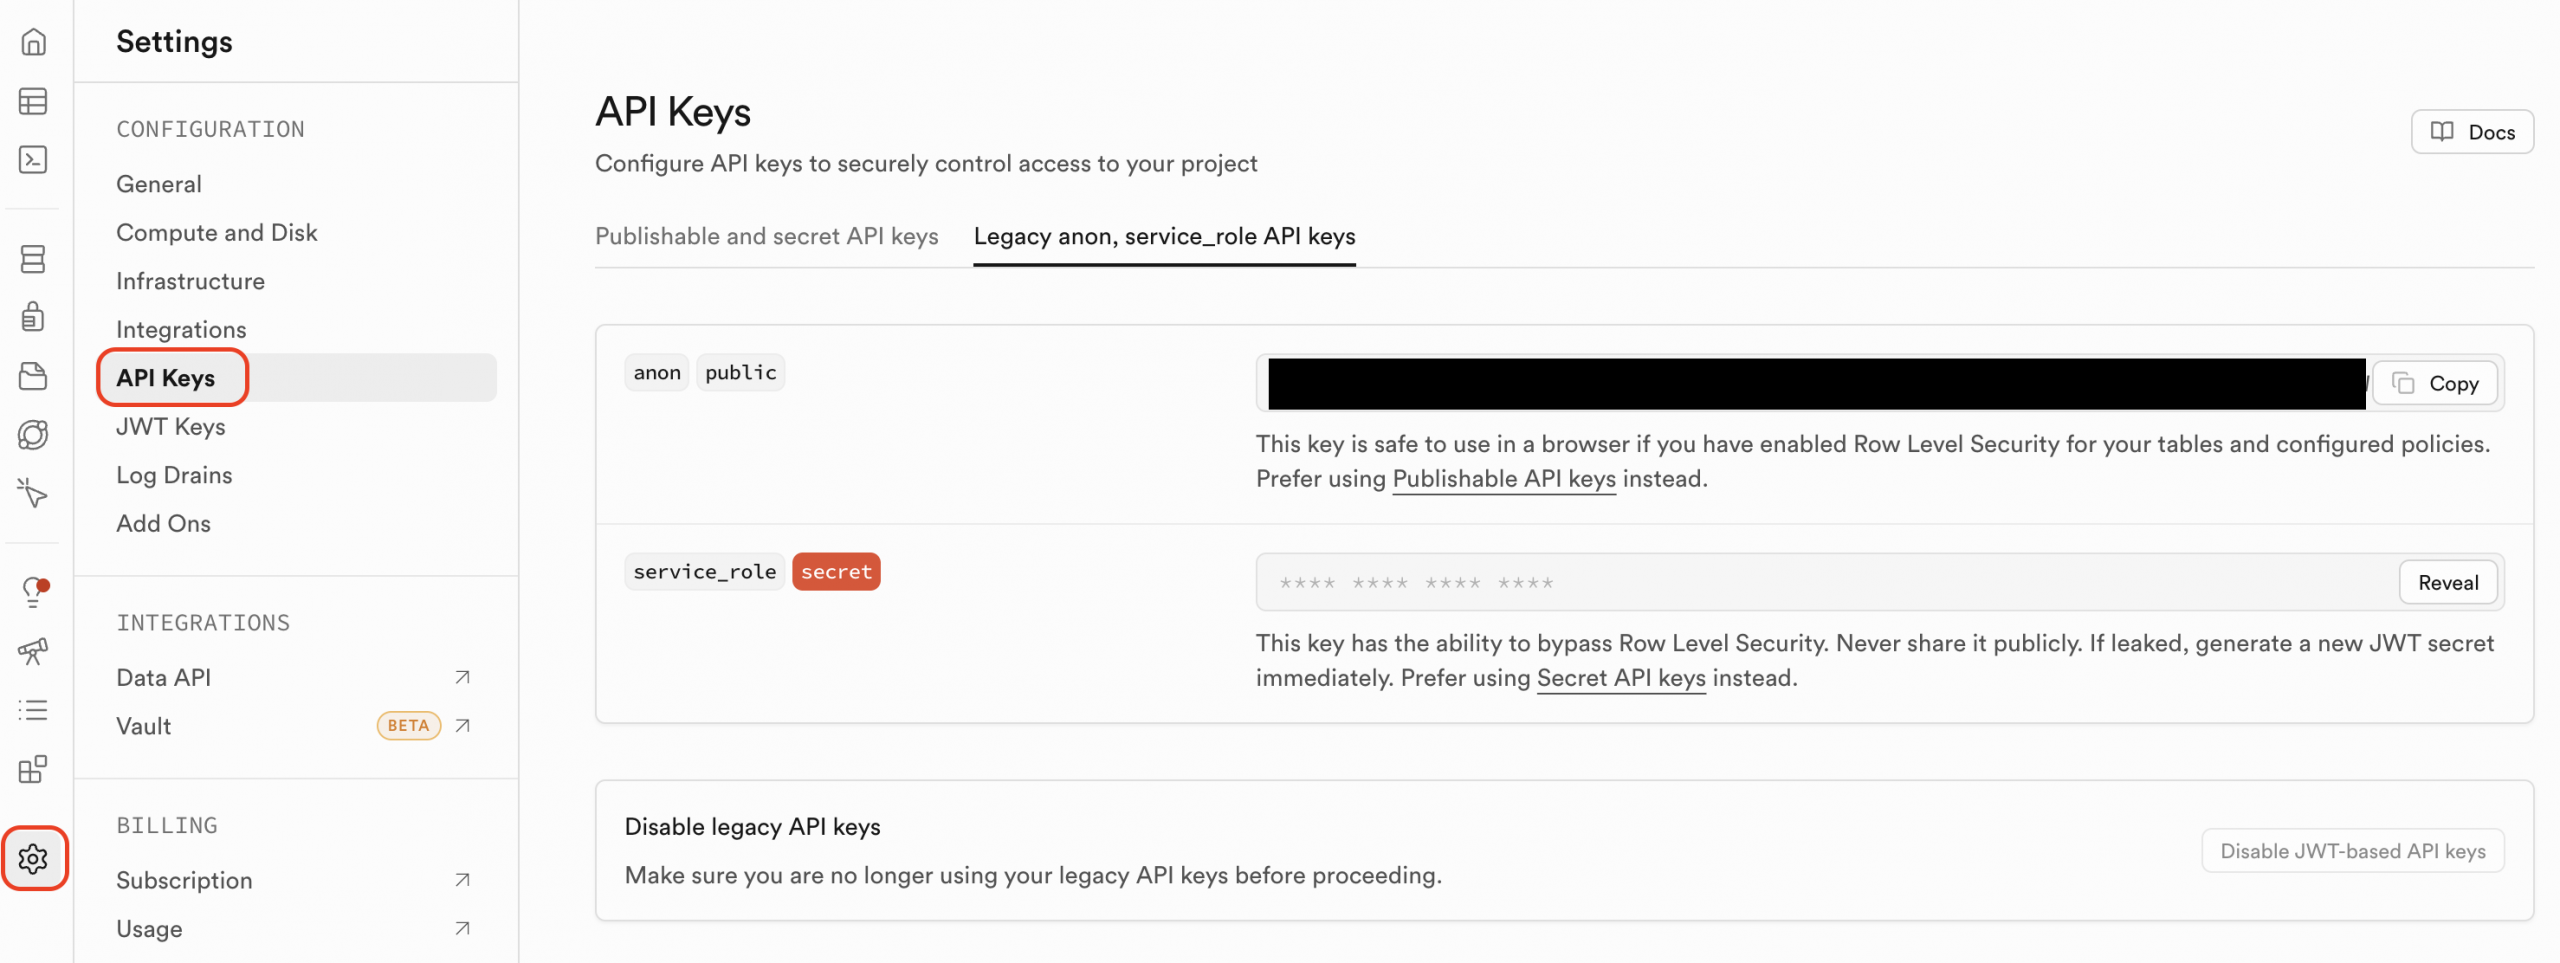
Also note your Supabase URL and keys — go to your Supabase project → Settings → API and copy:
• Project URL
• anon/public key
• service_role key (keep this one extra safe)
Open your Replit project. Look for "Secrets" in the Tools menu on the right.
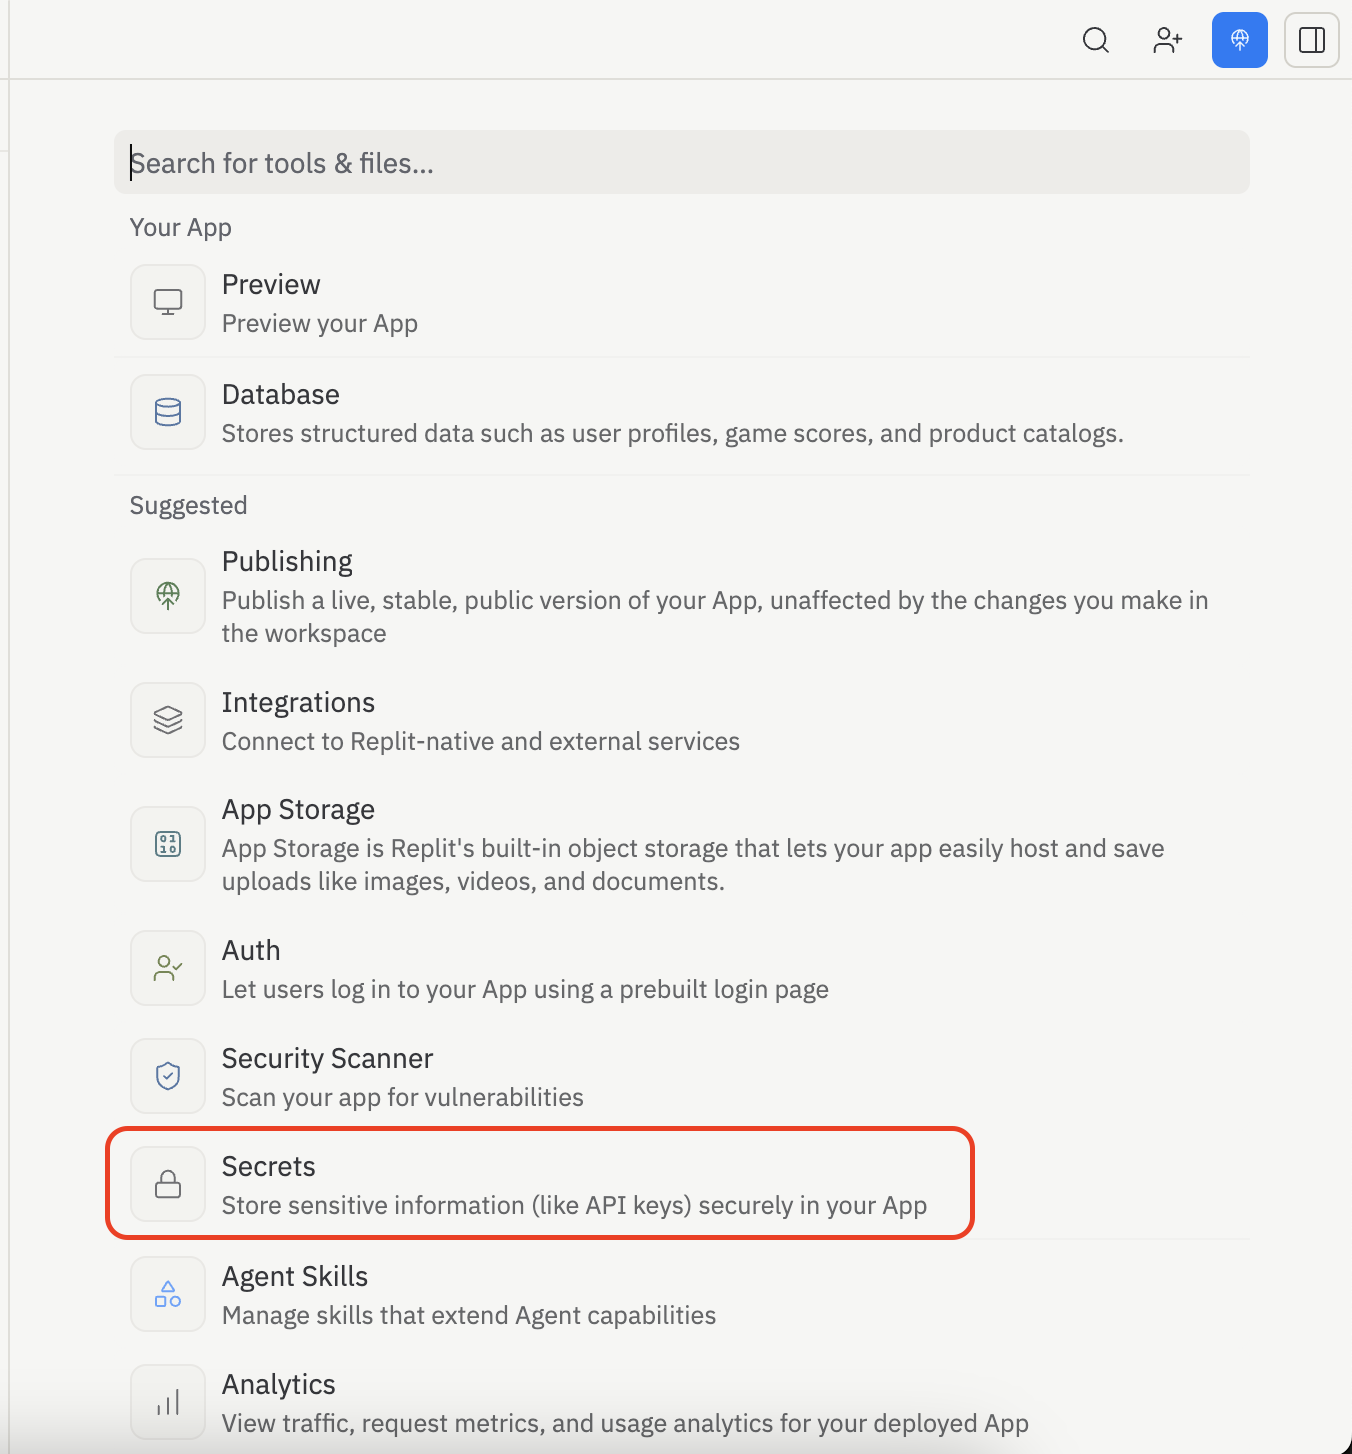
You'll see a list of your secrets. Each one has a key (the name) and a value (the secret itself).
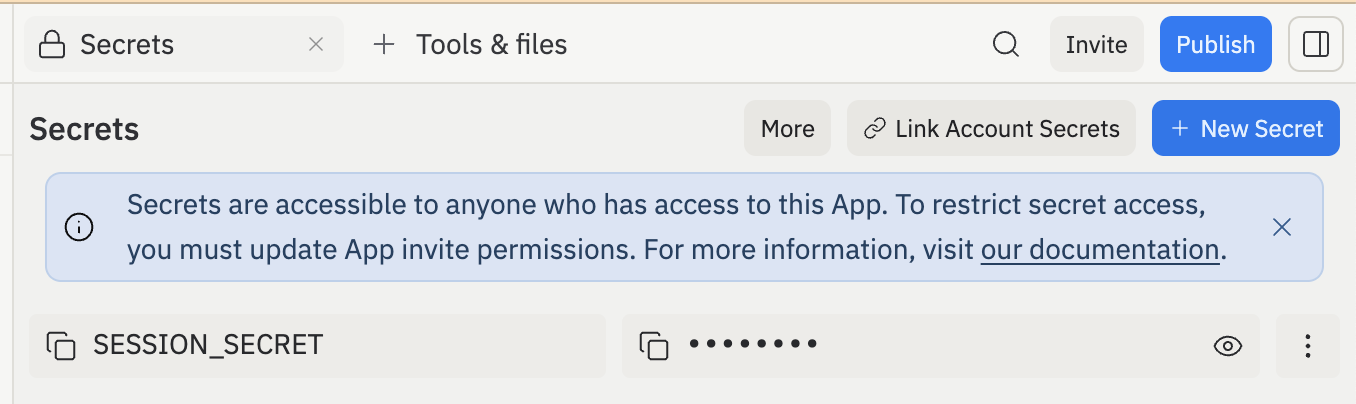
Click each secret and copy the value. Write them all down. They will not be exported with your code automatically — you must copy them manually.
Also note if you're using Replit's built-in Database — if your code mentions @replit/database, you'll need to export that data separately (see the Database section below).
Common variables and what they do
Here's a plain-English guide to what you might see:
| Variable Name | What it is | You'll need it on new host? |
|---|---|---|
| VITE_SUPABASE_URL NEXT_PUBLIC_SUPABASE_URL |
The address of your database | ✅ Yes |
| SUPABASE_ANON_KEY VITE_SUPABASE_ANON_KEY |
A public key for reading your database | ✅ Yes |
| SUPABASE_SERVICE_KEY SUPABASE_SERVICE_ROLE_KEY |
A powerful private key — keep this very secret | ✅ Yes — never share publicly |
| OPENAI_API_KEY ANTHROPIC_API_KEY |
Your AI service password — costs you money if misused | ✅ Yes — rotate after migration |
| STRIPE_SECRET_KEY STRIPE_WEBHOOK_SECRET |
Payment processing keys — very sensitive | ✅ Yes — and update Stripe dashboard |
| DATABASE_URL | Full address+password of your database | ✅ Yes — will change on new host |
| NEXTAUTH_SECRET JWT_SECRET |
Secret code used for user login security | ✅ Yes |
| NEXTAUTH_URL PUBLIC_URL |
The web address of your app | ✅ Yes — will change to your new address |
You can copy your existing keys directly to your new hosting platform and everything will keep working. However, as a best practice, you should eventually rotate (regenerate) your API keys — especially for payment services and AI APIs — to ensure no one who had access to the old platform can misuse them. You don't need to do this today; just keep it on your to-do list.
Create your .env file
In your project folder, create a file called .env and add your variables like this:
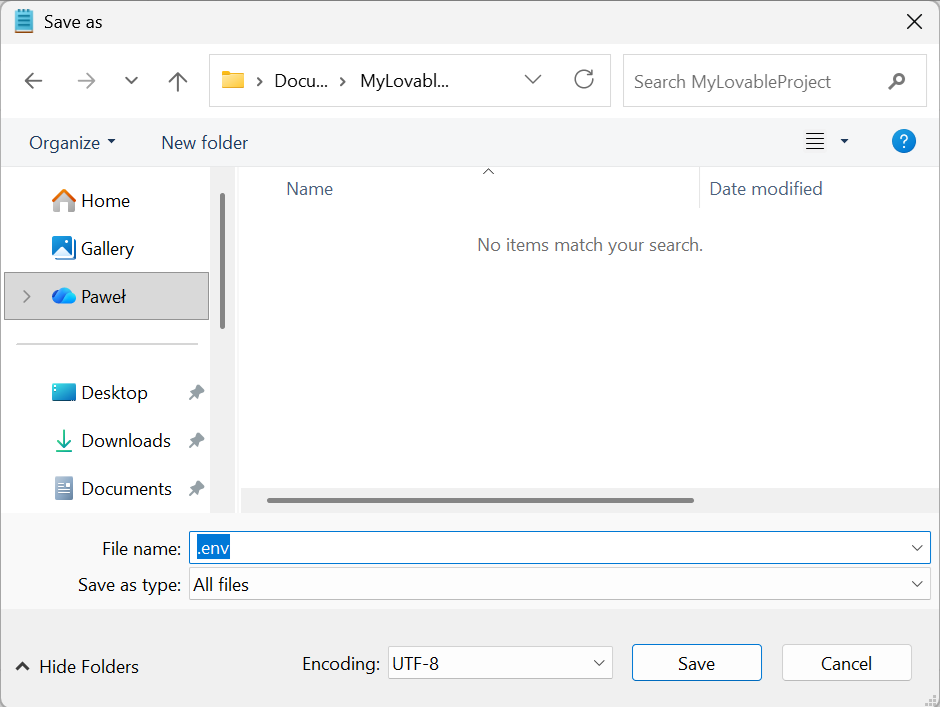
Open Notepad (search in Start menu). Type your variables like this — replace the example values with your real ones:
VITE_SUPABASE_URL=https://xxxxx.supabase.co
VITE_SUPABASE_ANON_KEY=your-key-here
OPENAI_API_KEY=sk-xxxxxxxxxxxx
Click File → Save As. Navigate to your project folder. In the "Save as type" dropdown, choose "All Files (*.*)". Name the file exactly: .env (with the dot at the start). Click Save.
In your Terminal (already open in your project folder), type:
nano .env
This opens a simple text editor inside Terminal.
Type your variables (replace with your real values):
VITE_SUPABASE_URL=https://xxxxx.supabase.co
VITE_SUPABASE_ANON_KEY=your-key-here
OPENAI_API_KEY=sk-xxxxxxxxxxxx
Press Ctrl + X to exit, then Y to save, then Enter to confirm.
Your .env file contains passwords. Make sure it's listed in your .gitignore file. In your command window, type:
echo ".env" >> .gitignore
Save Your Data
If your project stores any information (users, posts, orders, etc.) you need to back it up before moving.
If your app lets users sign up, saves any information, or has any content that changes — you have a database. If it's a simple display-only website with no logins, you probably don't. When in doubt, follow these steps anyway.
Back up your Supabase database
Lovable uses Supabase — here's how to save everythingLog in at supabase.com and open your project.
In the left menu, go to Project Settings → Database.
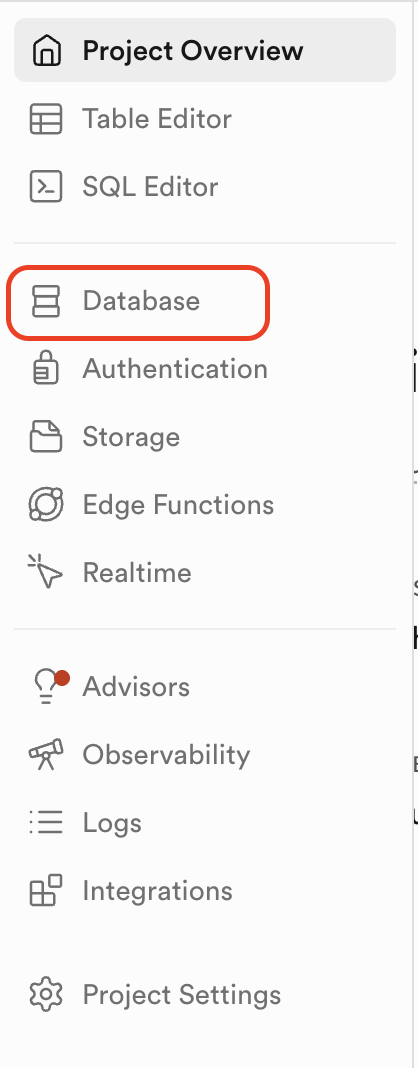
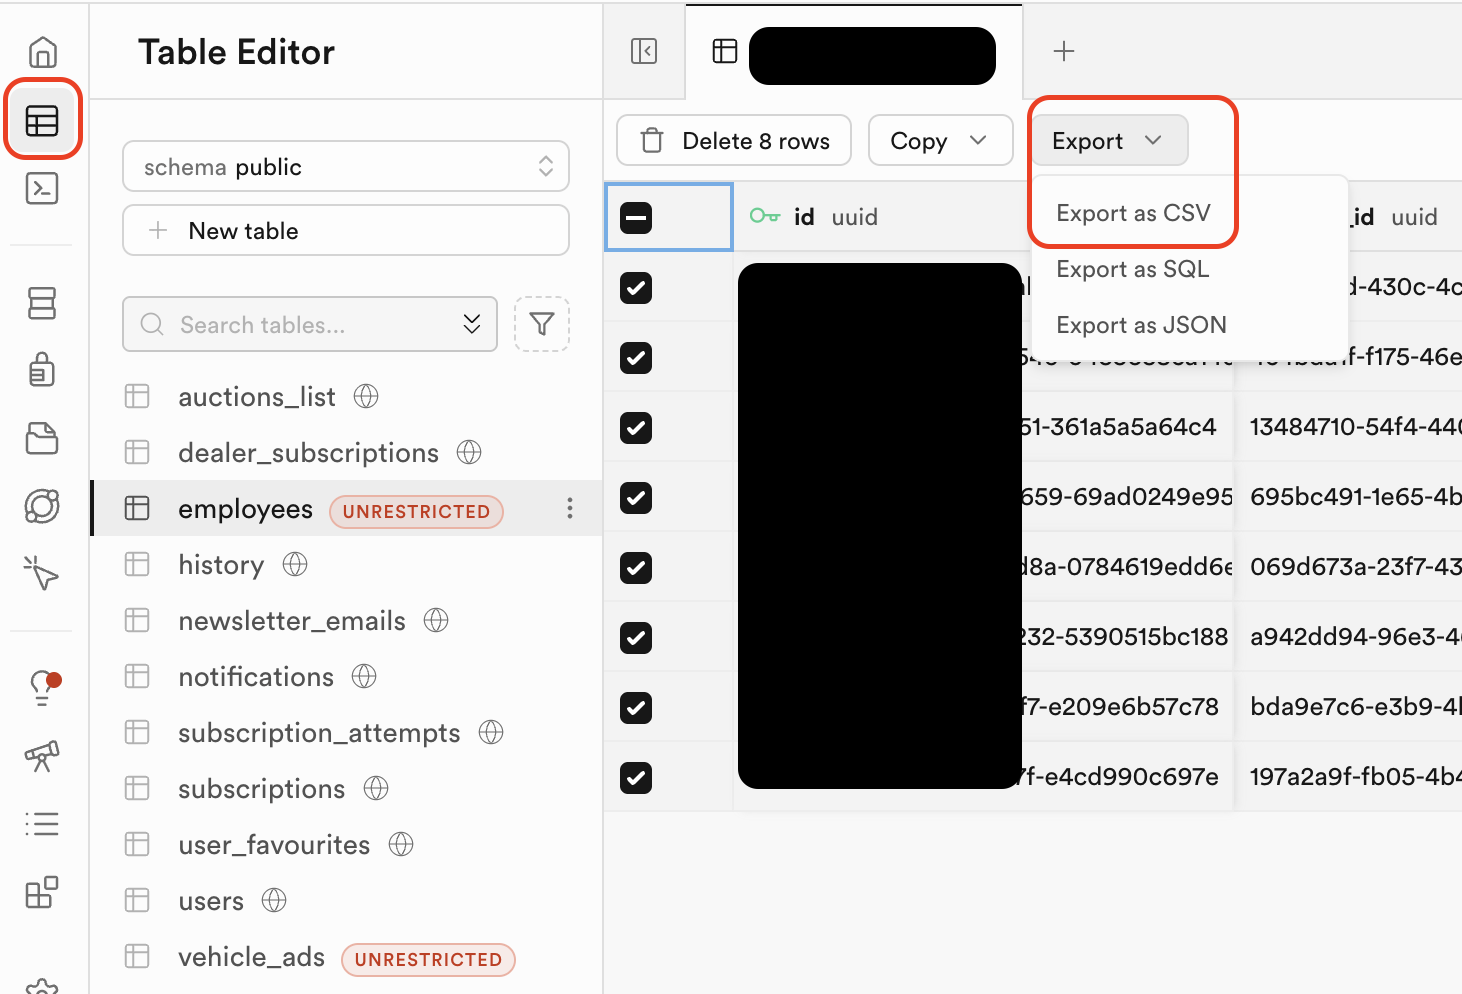
Scroll down to find the Backups section (available on paid plans) or use the Table Editor to export each table as a CSV file: go to a table, click Export, save the file.
Good news: Many people keep their Supabase database exactly as-is and just point their new hosting to the same Supabase project. This is the easiest option — your data never moves, only your app code does.
You don't have to move your Supabase database at all. Just deploy your code to a new host (like Vercel or Railway) and keep using the same Supabase project. Just copy your Supabase URL and keys to the new host's environment variables. Done.
Back up Replit's built-in database
Only needed if your app uses @replit/databaseReplit has a simple built-in key-value store that's unique to each project. It won't move automatically and doesn't export easily. If your app uses @replit/database, you'll need to replace it with a real database after moving. The most common choice is Turso (free, simple, very similar to use).
In your Replit project, open the Shell tab and run this to export all your data to a file:
# This prints all your stored data
node -e "const D=require('@replit/database');
const d=new D();
d.list().then(k=>Promise.all(k.map(async key=>
({key,val:await d.get(key)}))).then(r=>
console.log(JSON.stringify(r,null,2))))"
Copy the output (all the data printed) and save it in a text file called replit-data-backup.json on your computer.
Deploy to Your New Home
We recommend Vercel for most projects — it's free, fast, and connects directly to GitHub.
For most Lovable/Replit projects: Vercel (if it's a website/app built with Next.js or React) or Railway (if it has a backend server). Both have free tiers. The steps below use Vercel.
Deploy to Vercel (recommended for most projects)
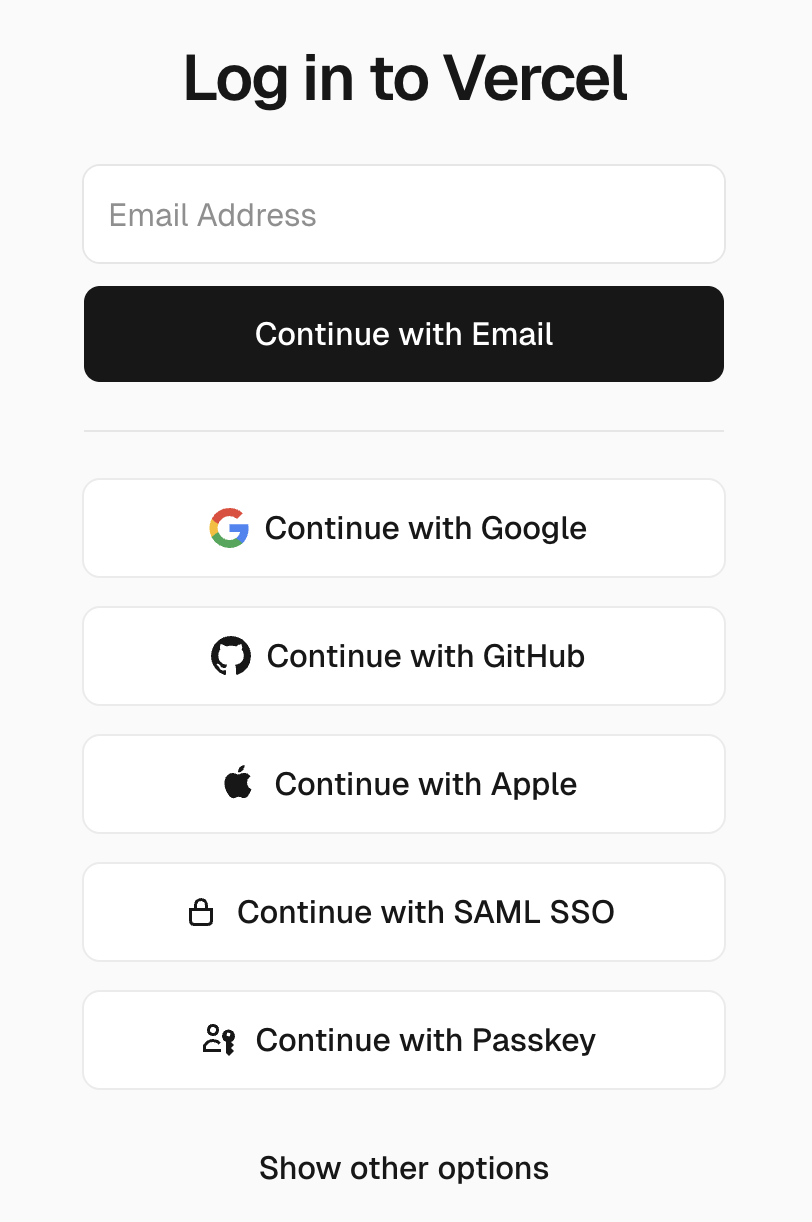
Free to start, takes about 5 minutesMake sure your code is on GitHub (from Step 1). Then go to vercel.com and click Sign Up → Continue with GitHub.
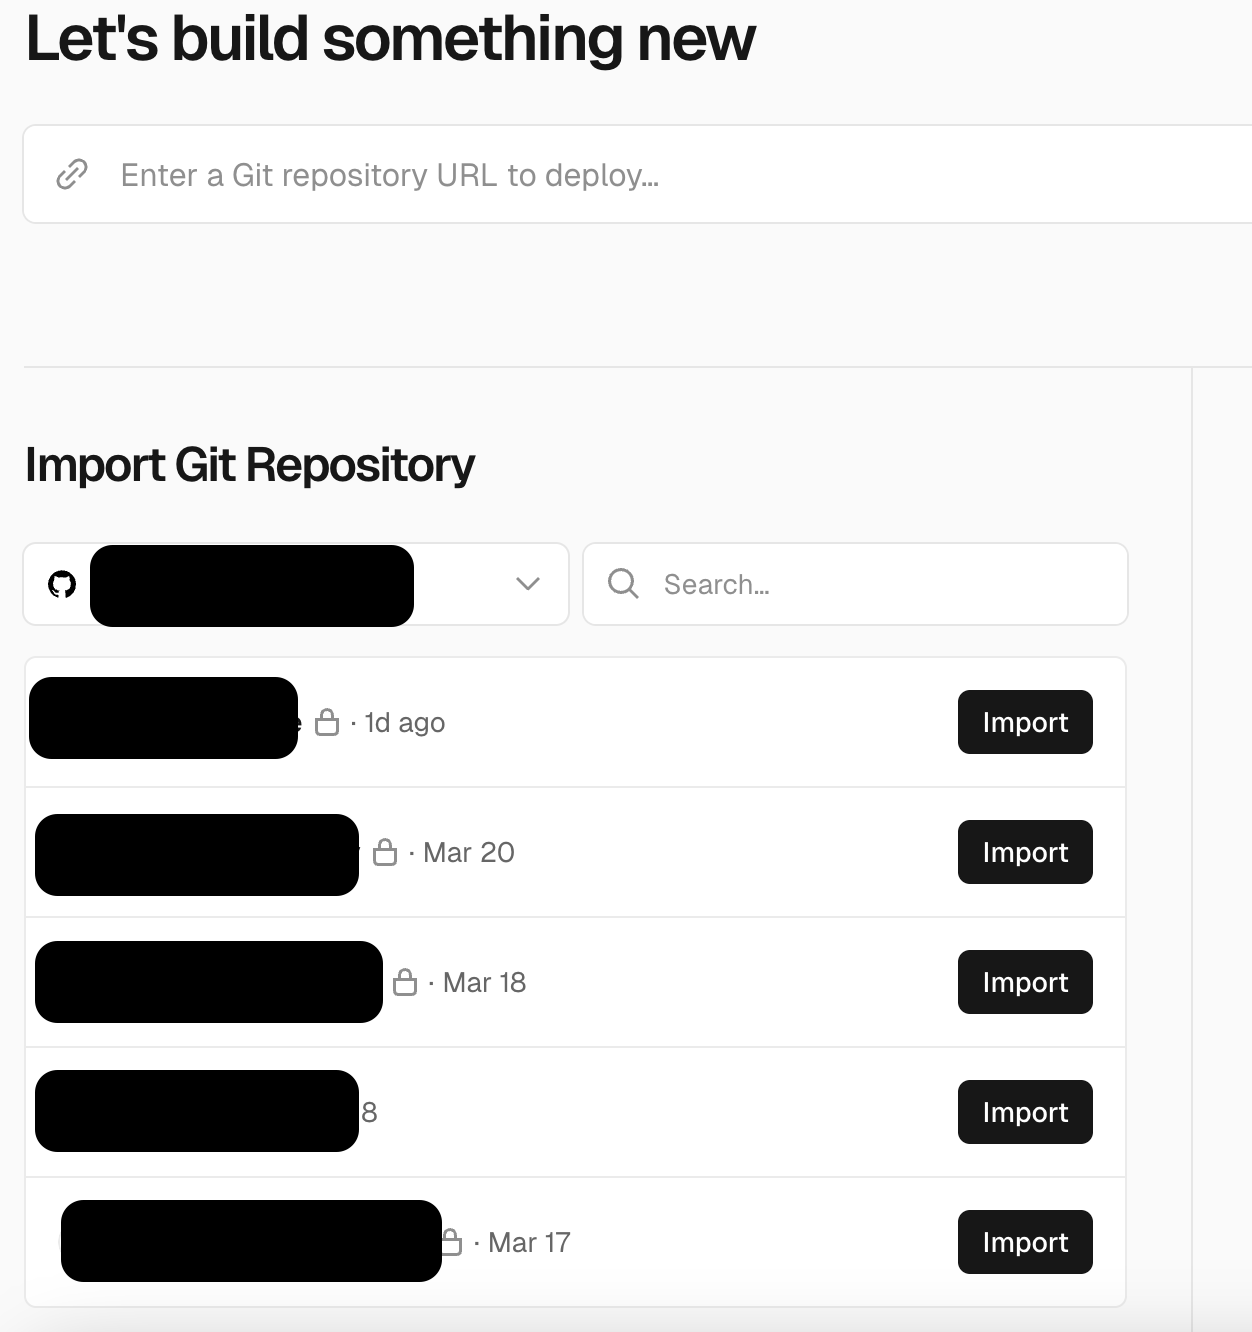
Click Add New Project → Import your GitHub repository.
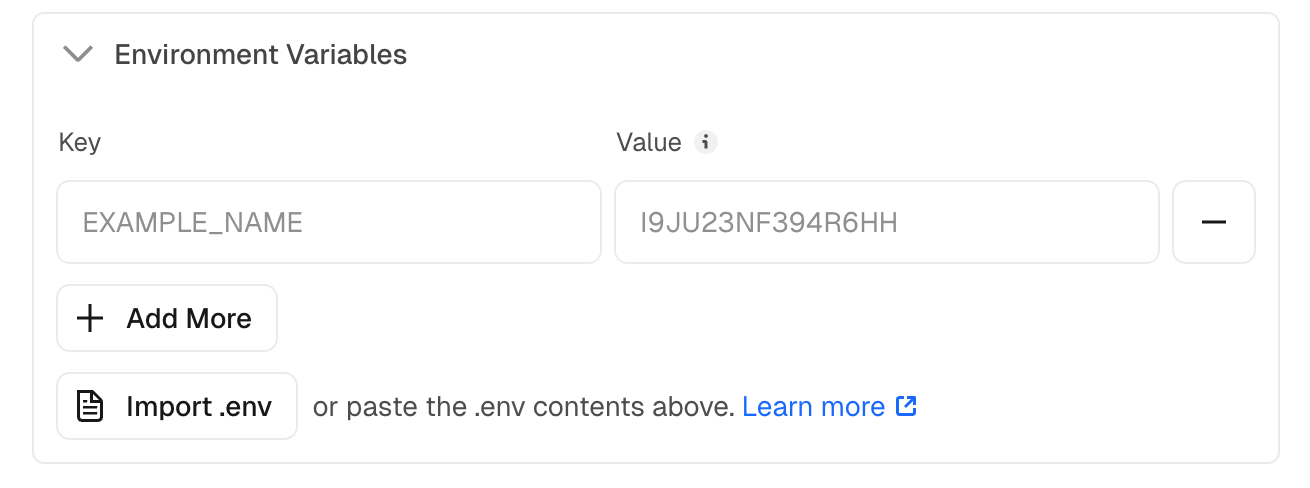
Before clicking Deploy, find the Environment Variables section and add all the variables you saved in Step 2. Add them one by one — Name on the left, value on the right.
Click Deploy. Vercel will build your project. After 1–3 minutes, you'll get a URL like your-project.vercel.app. Open it and test everything.
Test everything before moving your domain
Don't touch your domain until this checklist is green- Homepage loads without errors
- User sign up works (if you have auth)
- User login works
- Any forms submit correctly
- Images and files load
- If you have payments — test with Stripe's test card number (4242 4242 4242 4242)
- Check on your phone too
- Compare with your "before" screenshots from Step 0
Move your custom domain (if you have one)
Only do this once all tests passWhen you change where your domain points, it can take up to 48 hours to fully update worldwide. During this time, some visitors see the old site and some see the new one — this is normal. Plan to do this step on a quiet day (not before a big launch).
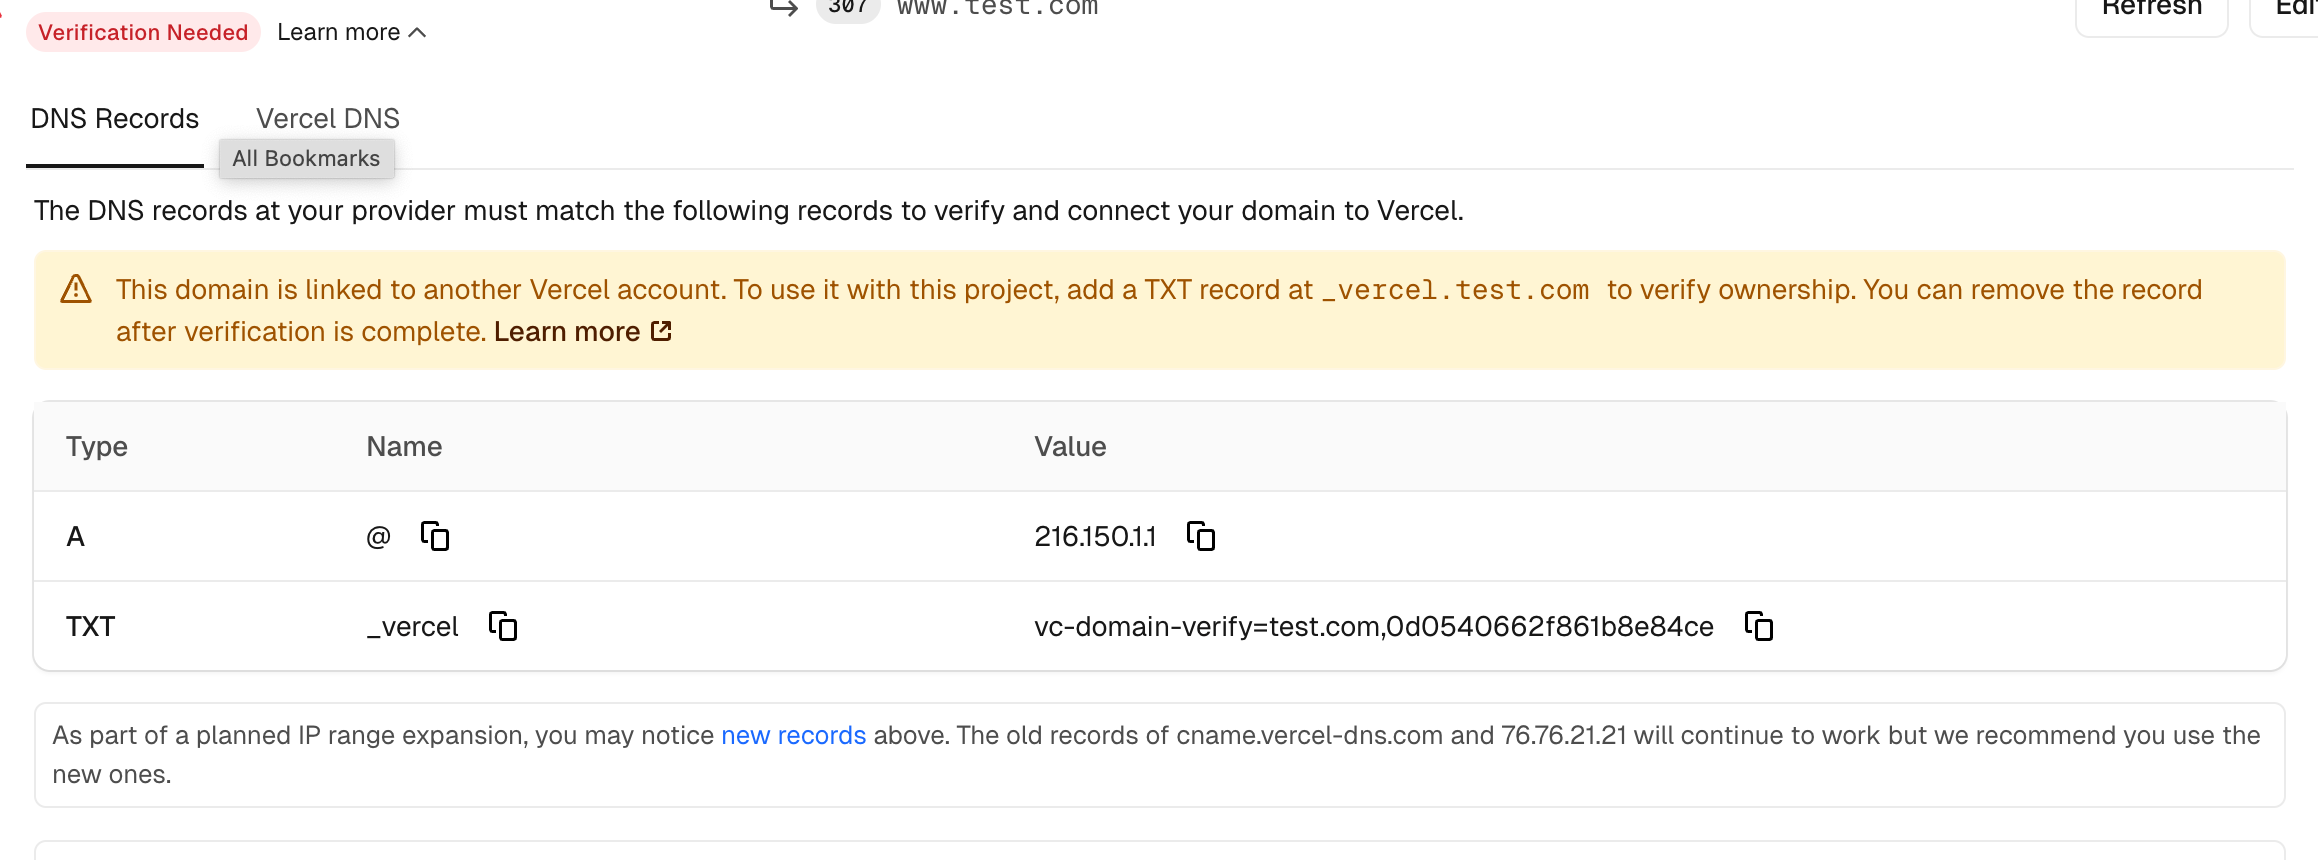
In Vercel: go to your project → Settings → Domains → add your custom domain.
Vercel will show you DNS records to add. Log in to wherever you bought your domain (GoDaddy, Namecheap, Cloudflare, etc.) and update those records.
Wait. After your domain is working, update the NEXTAUTH_URL or PUBLIC_URL environment variable to your real domain name.
Choosing a New Home
Not sure which platform is right for you? Here's a plain-English breakdown.
🌐 For your app (the website part)
Vercel ⭐ Recommended
Best choice for React/Next.js projects. Super easy. Connects to GitHub and deploys automatically on every save.
Netlify
Very similar to Vercel. Great for any website. Easy to use, reliable, good free tier.
Railway ⭐ Replit users
The closest thing to Replit but for production. Runs any type of app. Includes a database. Good for backends.
Render
Simple, reliable, runs any kind of project. Good if you have a backend server (Express, FastAPI, etc.).
🏗️ For your database (if moving away from Supabase)
Keep Supabase ⭐ Easiest
You don't have to move the database at all. Just move your app code and point it at the same Supabase project.
Neon
Another free PostgreSQL database. Very similar to Supabase's database. Easy to switch to.
Turso
Best replacement for Replit's built-in database. Free, fast, simple.
PlanetScale
Great for larger projects. Has a git-like branching system for your data.
Talk to your code
Ask "why is this broken?" or "add a dark mode" in plain English
Understands your whole project
Reads all your files so it knows the full picture, not just one snippet
Writes and edits files
Makes actual changes to your code — you review and approve each one
Finds bugs
Point it at an error message and it traces the problem for you
Handles Git for you
Writes commit messages, creates branches — all through plain English
Works in your editor too
VS Code extension and Desktop App — no terminal required
What you need before installing
Two things: a subscription and Git — which you already installed in Step 1!Claude Code requires a Claude Pro subscription ($20/month at claude.ai) for regular use, or Claude Max ($100/month — better value if you're using it heavily every day). Alternatively, pay-as-you-go API credits via console.anthropic.com. For most people just starting out, Claude Pro is the right choice.
You installed Git back in Section 1. Claude Code on Windows needs Git for Windows — which you already have. Nothing extra to install.
Install Claude Code
One command — takes under 2 minutesPress the Windows key, search for PowerShell, and open it.

Type this command and press Enter:
winget install Anthropic.ClaudeCode
If winget isn't available, use this alternative:
# Alternative native installer
Invoke-WebRequest -Uri "https://claude.ai/install.ps1" -UseBasicParsing | Invoke-Expression
Close and reopen PowerShell, then confirm it worked:
claude --version
You should see a version number like claude 1.x.x ✅
Open Terminal (press ⌘ + Space, type Terminal, press Enter).
Paste this command and press Enter:
curl -fsSL https://claude.ai/install.sh | bash
This downloads and installs Claude Code automatically. No Node.js needed.
Close and reopen Terminal, then confirm it worked:
claude --version
You should see a version number ✅
Log in to your Claude account
One-time setup — it opens a browser window for youOpen a command window inside your project folder (the same way you did in Section 1, Step C).
Type:
claude
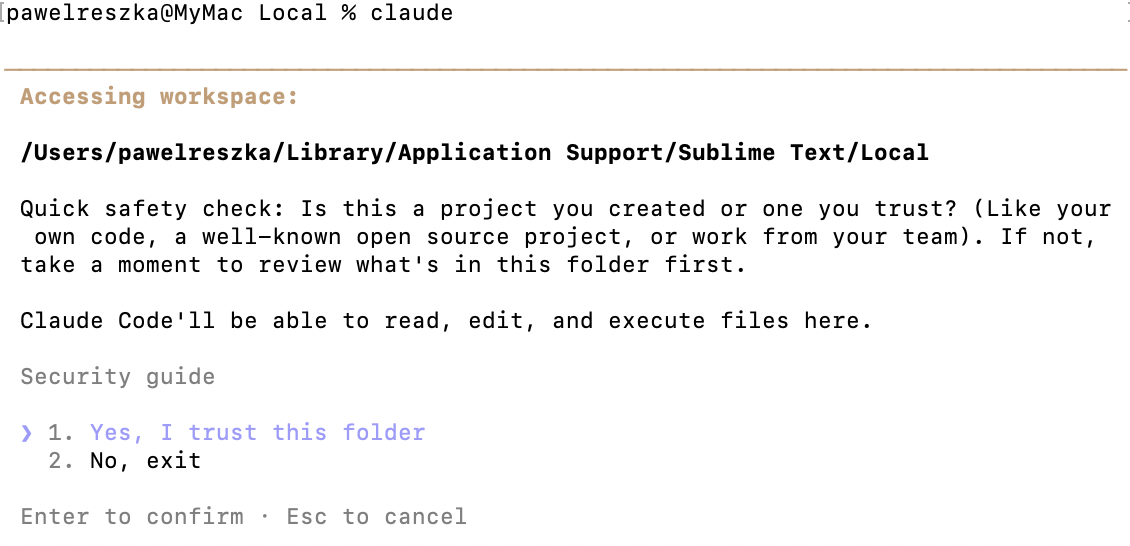
The first time, it will ask you to log in. Press Enter — a browser window opens automatically. Log in with your Claude account (Pro or Max) and come back to the terminal when done.
After login, Claude Code starts and shows a welcome screen. You're in. 🎉
Connect Claude Code to your project
Tell Claude about your project so it can help effectivelyThe key to getting great help from Claude Code is a file called CLAUDE.md. It's a simple text file in your project folder that tells Claude what your project does and how it's set up — like a briefing note for your AI assistant.
Please look at all the files in this project and create a CLAUDE.md file that describes what the project does, what tech stack it uses, and how to run it locally.
Or create it yourself — here's a simple template to fill in:
# Save this as CLAUDE.md in your project folder

## What this project is
[Describe your app in 2-3 sentences]

## Tech stack
- Framework: Next.js / React / Vite (pick one)
- Database: Supabase / Neon / none
- Styling: Tailwind CSS
- Auth: Supabase Auth / NextAuth / none

## How to run it locally
npm install
npm run dev
Then open http://localhost:3000

## Important notes
- [Any quirks Claude should know about]
The CLAUDE.md file is safe to upload to GitHub — so never put passwords, API keys, or anything private in it. Just describe your project structure and preferences.
Using Claude Code day-to-day
Plain English examples — just type these into the terminalOnce Claude Code is running in your project folder, just type what you need. Here are real examples:
I'm getting this error when I click the login button: "Cannot read properties of undefined (reading 'user')". Can you find where this is coming from and fix it?
Add a "forgot password" link to the login page that sends a reset email using Supabase.
The homepage hero section feels cluttered. Make it cleaner — bigger text, less padding on mobile, and change the button colour to match the logo.
I didn't write this code — it was generated by Lovable. Can you explain what the /api/webhooks/stripe.ts file does, step by step?
I've made some changes. Can you write a good commit message, commit everything, and push it to GitHub so Vercel deploys it?
Be specific about what you want and what's going wrong. Paste full error messages. Say which file or page you're talking about. You can always say "show me what you're planning to change before doing it" to review before Claude makes any edits.
Claude Code also has a Desktop App for Windows and Mac — download it from claude.ai/download. There's also a VS Code extension — search "Claude Code" in the Extensions panel to use it right inside your code editor.
Handy commands to know
Quick reference — bookmark this# Start Claude Code in your project folder claude # Ask a quick one-off question claude -p "What does the auth.ts file do?" # If something seems wrong, run a health check claude doctor # Update to the latest version Mac: claude update Win: winget upgrade Anthropic.ClaudeCode # Inside a Claude Code session: /help — see all available commands /bug — report a problem with Claude Code itself /exit — close the session
Final Migration Checklist
Tick everything off before calling it done.
- ☐ Code exported and on GitHub
- ☐ All environment variables copied from old platform
- ☐ .env file created locally (and in .gitignore)
- ☐ Database backed up (or confirmed staying on Supabase)
- ☐ Deployed to new host (Vercel, Railway, etc.)
- ☐ All environment variables added to new host
- ☐ App fully tested on new host URL
- ☐ Custom domain pointed to new host (if applicable)
- 🔑 Remind yourself to rotate API keys when you have time
- 💸 Cancel your old Lovable/Replit subscription (only once 100% working)
Your project is now running on infrastructure you control. No more platform-specific lock-in, no more surprise pricing changes. From here, your code deploys automatically every time you push to GitHub.